1
Get the right role
cro writes ControlBooks and generates reports.2
Pick regulations
29 ship in the catalog. Add your own internal policies.
3
Write the ControlBook
Map each obligation to evaluators and a threshold.
4
Activate it
One active ControlBook per install drives gates and reports.
5
Generate a report
Per agent, per period, signed by the appliance.
6
Hand evidence to the examiner
A report plus a verifiable evidence pack.
1. Get the right role
The cro role can write ControlBooks, generate reports, propose erasures, place legal holds, and approve agent intakes. It cannot write evidence or decide review items. An approver can be the second pair of eyes for erasures and intakes. Most of this journey works in the Console. Each step also shows the command-line equivalent. Commands use yoursk_ token in
SENGOL_API_TOKEN; REST calls exchange it for a session token first:
2. Pick regulations
In the Console, open Evidence → Library: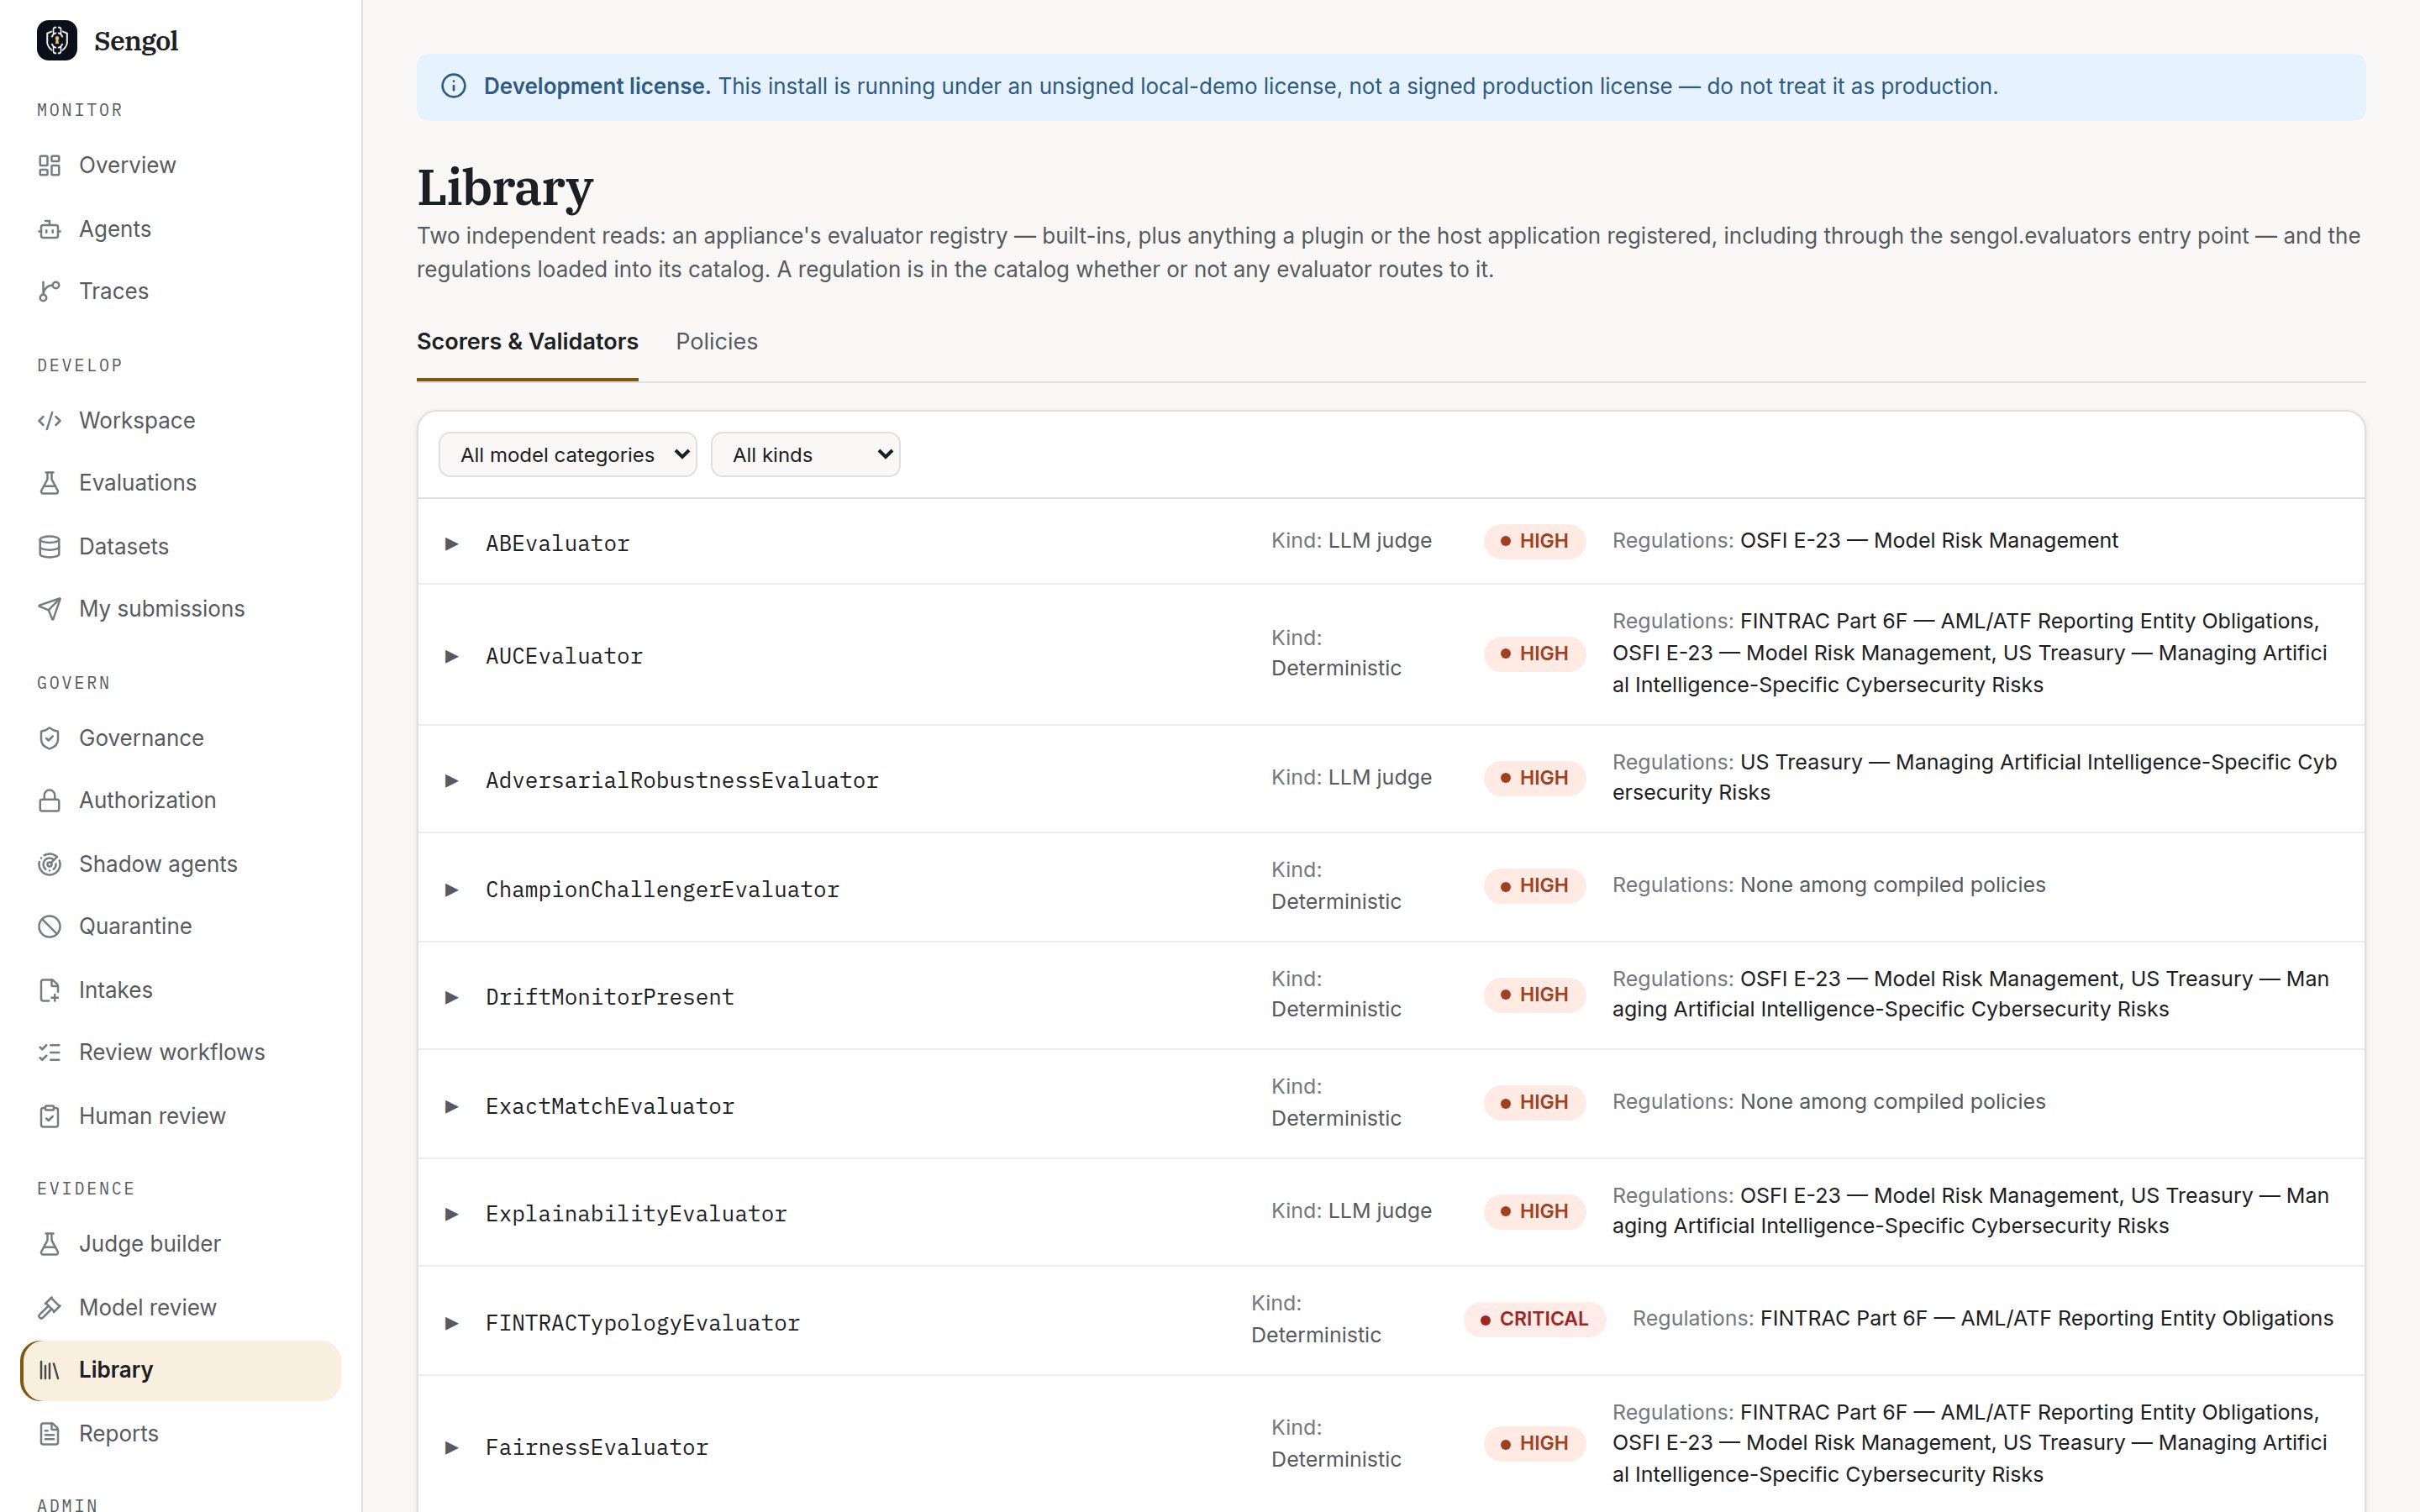
Library: the evaluator registry and the regulation catalog.
3. Write the ControlBook
Each obligation names the regulation it serves, the evaluators that test it, and the pass rate it needs:controlbook.yaml
critical_veto or
coverage_required. Every field is explained in ControlBook.
4. Activate it
In the Console, open Settings → General. In the ControlBook card, choose the YAML file, then Validate & apply. The card shows the active id and version. Through the API:- Reports use the active ControlBook.
- A developer’s gate that names a ControlBook is refused unless it is the
active one:
ControlBook acme-advisory-agents 2026.1 is not the active ControlBook. - To change a ControlBook, bump
version. Re-uploading the same id and version with different content is refused with409.
suite.controlbook in
their sengol.yaml (CI gate).
5. Generate a report
A report checks one agent’s records over a period against every obligation. In the Console, open Evidence → Reports and choose Generate. Through the API: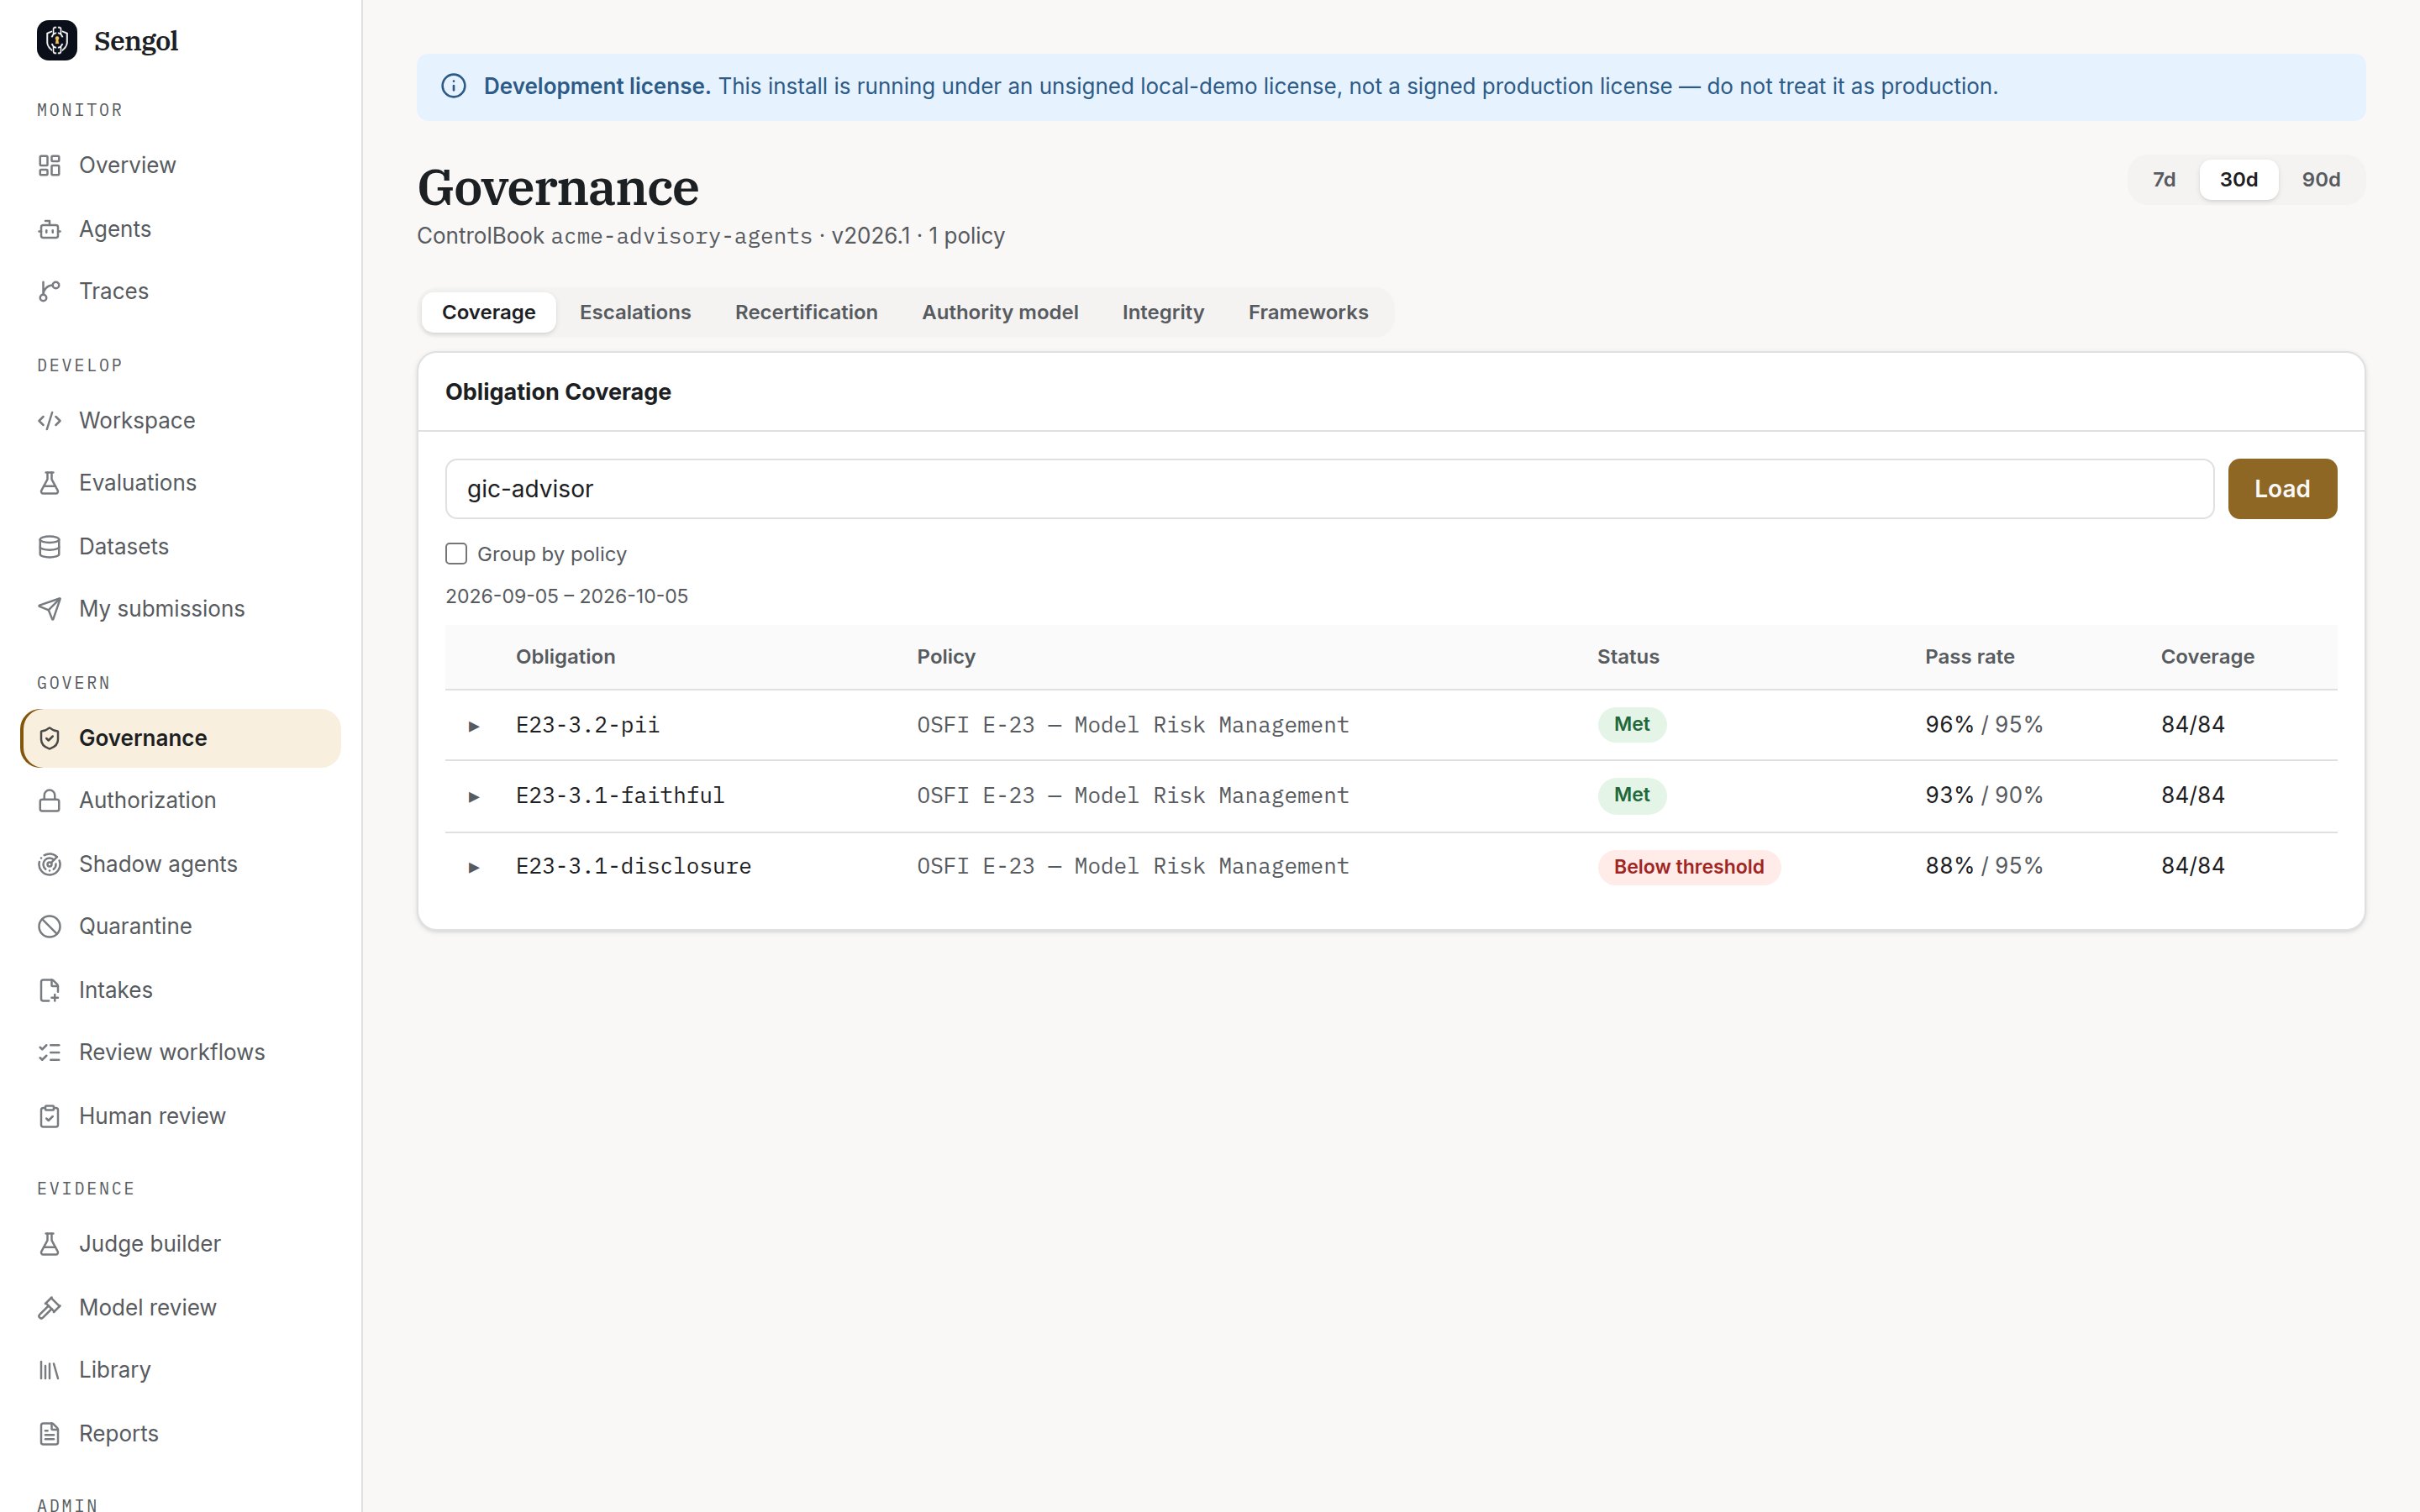
Governance → Coverage for gic-advisor under the active ControlBook.
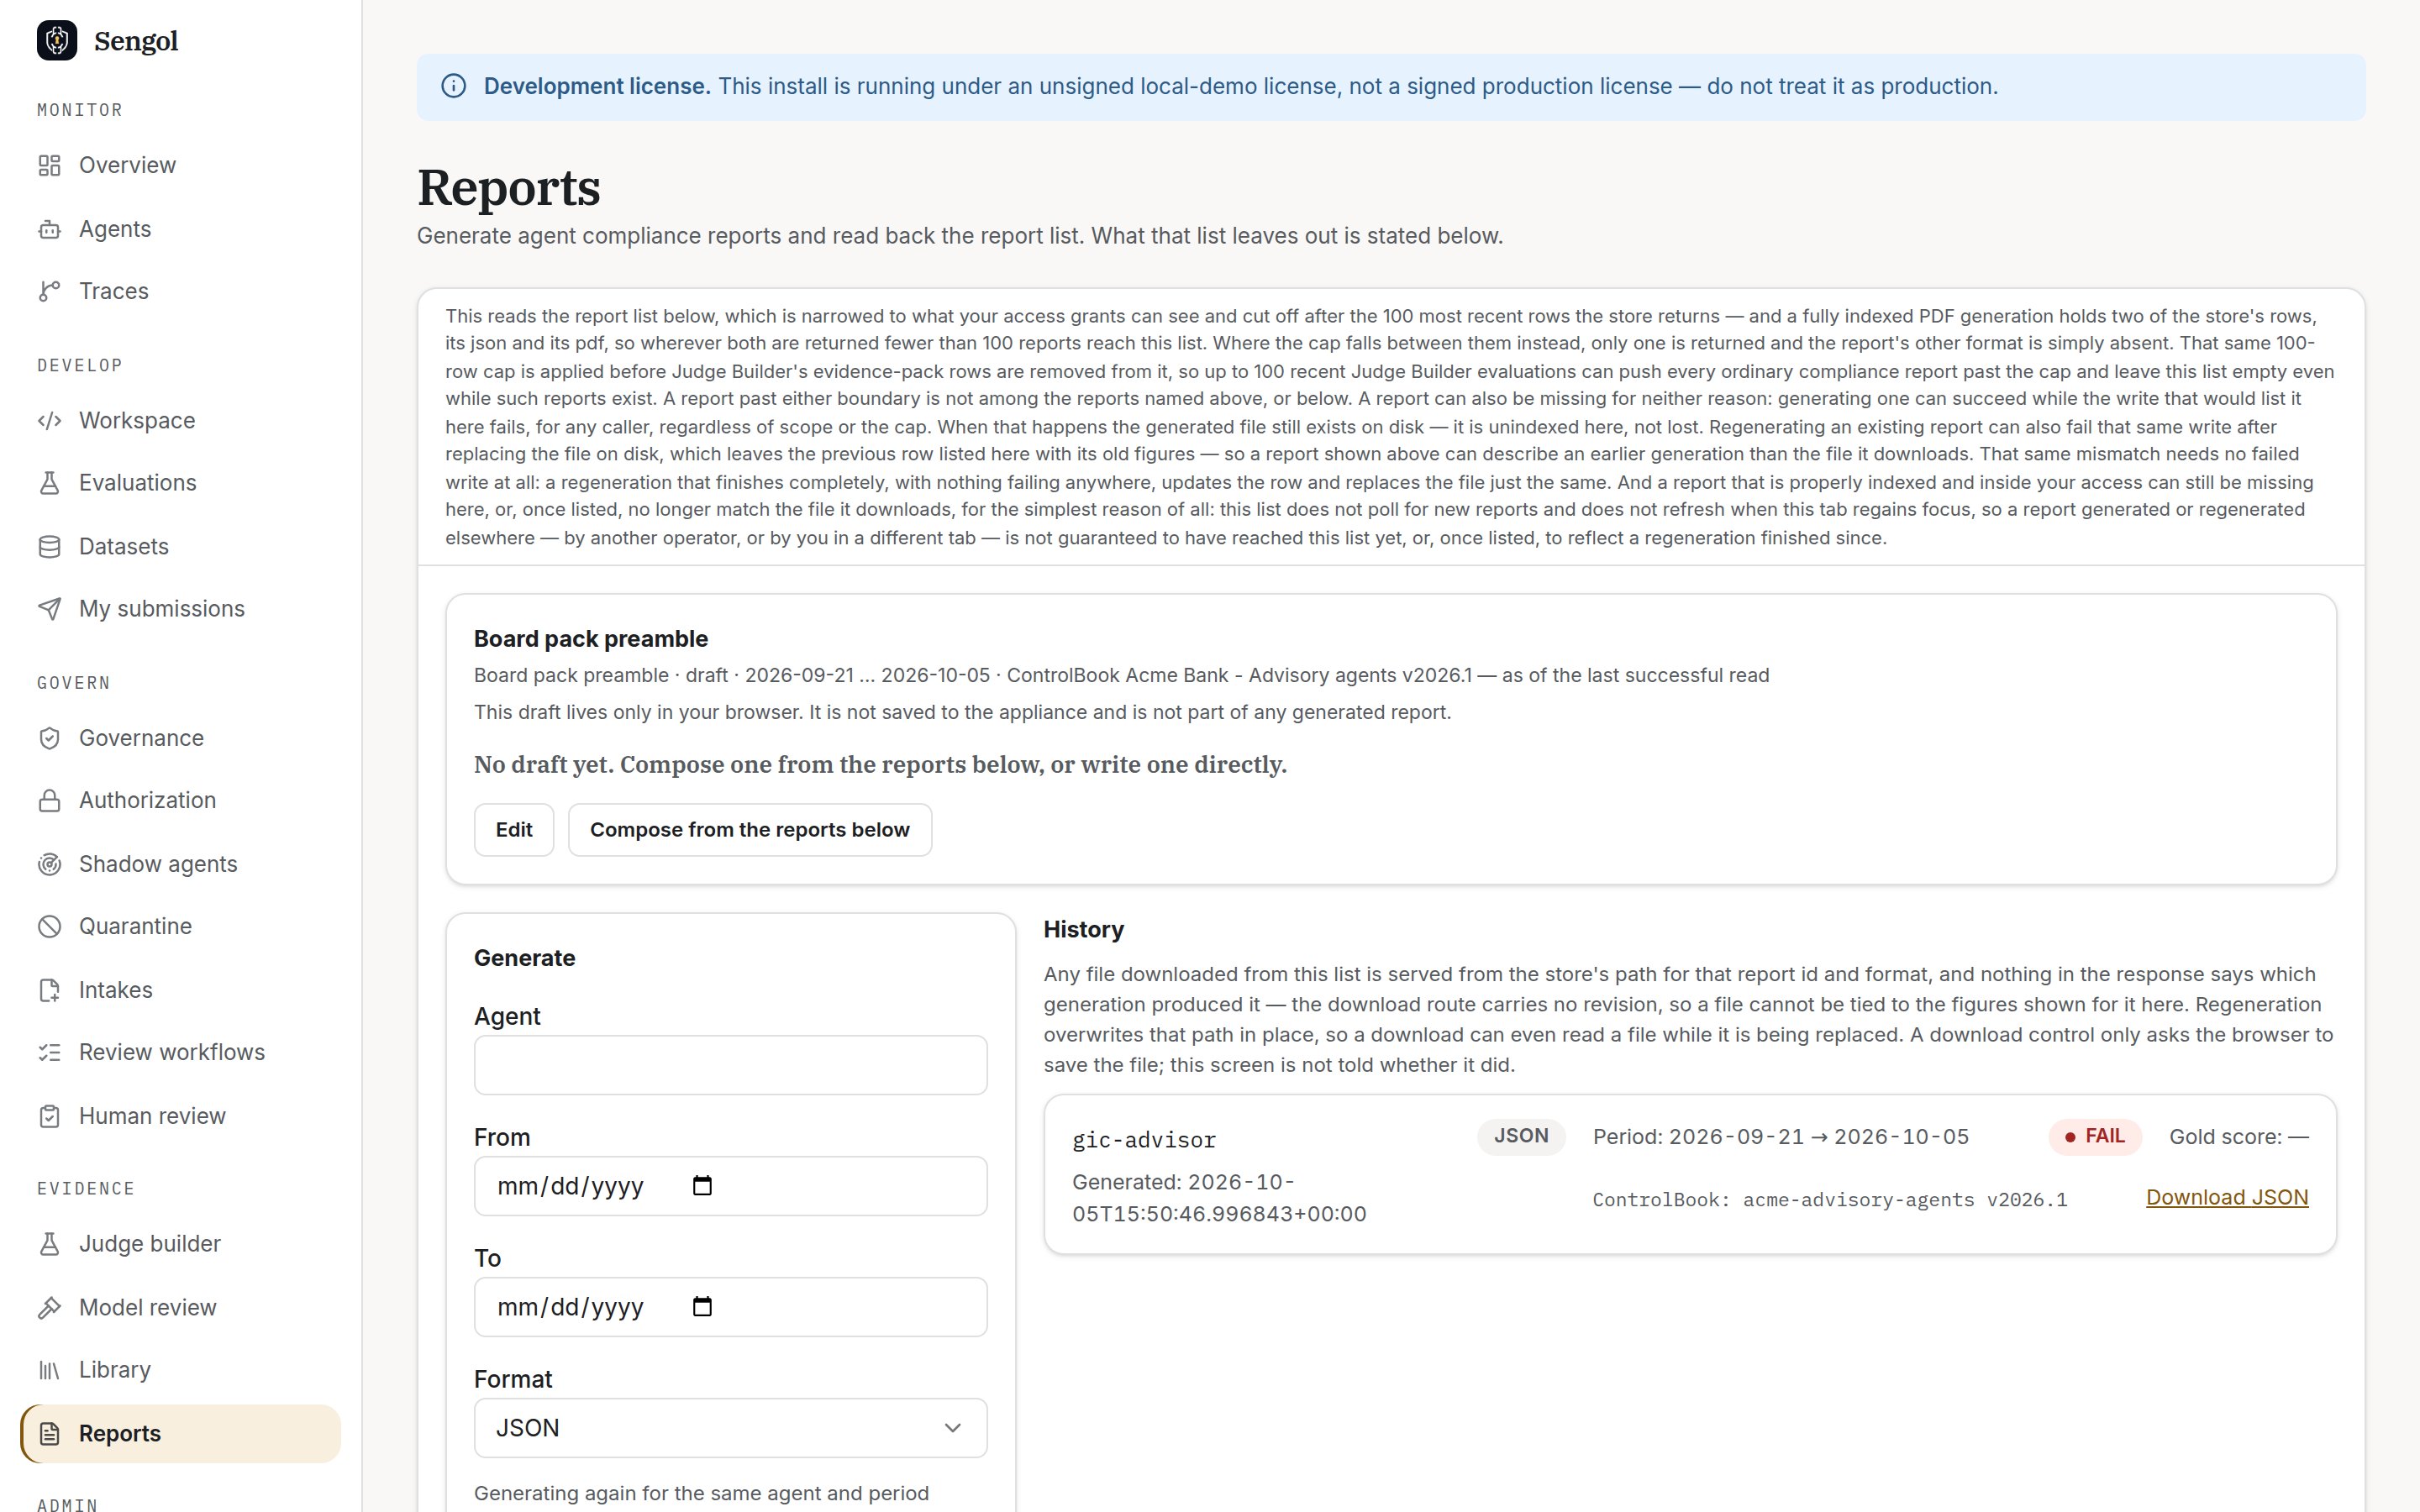
Reports: generate, then download the signed report.
format: "pdf" adds a PDF beside the JSON when the appliance has the
reports extra installed.
6. Hand evidence to the examiner
Give the examiner:- the signed report,
- the evidence pack for the same agent (
sengol export --agent gic-advisor --out pack.json), - the appliance’s public key, through a separate channel.
Approve an agent intake
A developer proposes each new agent as an intake.cro, approver and
admin can approve it, and approving needs an interactive sign-in: SSO, a
password, or sengol login --device. An sk_ token or the bootstrap-secret
token cannot approve.
Open Govern → Intakes and select the intake. The page shows the
developer’s answers, the Approvals on this revision panel and an
Actions card.
- Approve registers the agent. It issues no credential. Approval signs the decision and the agent’s first risk tier.
- Revise saves your edits as a new revision. Earlier approvals stop counting.
- Reject needs a reason. The agent id stays reserved.
- Withdraw is for the person who submitted it.
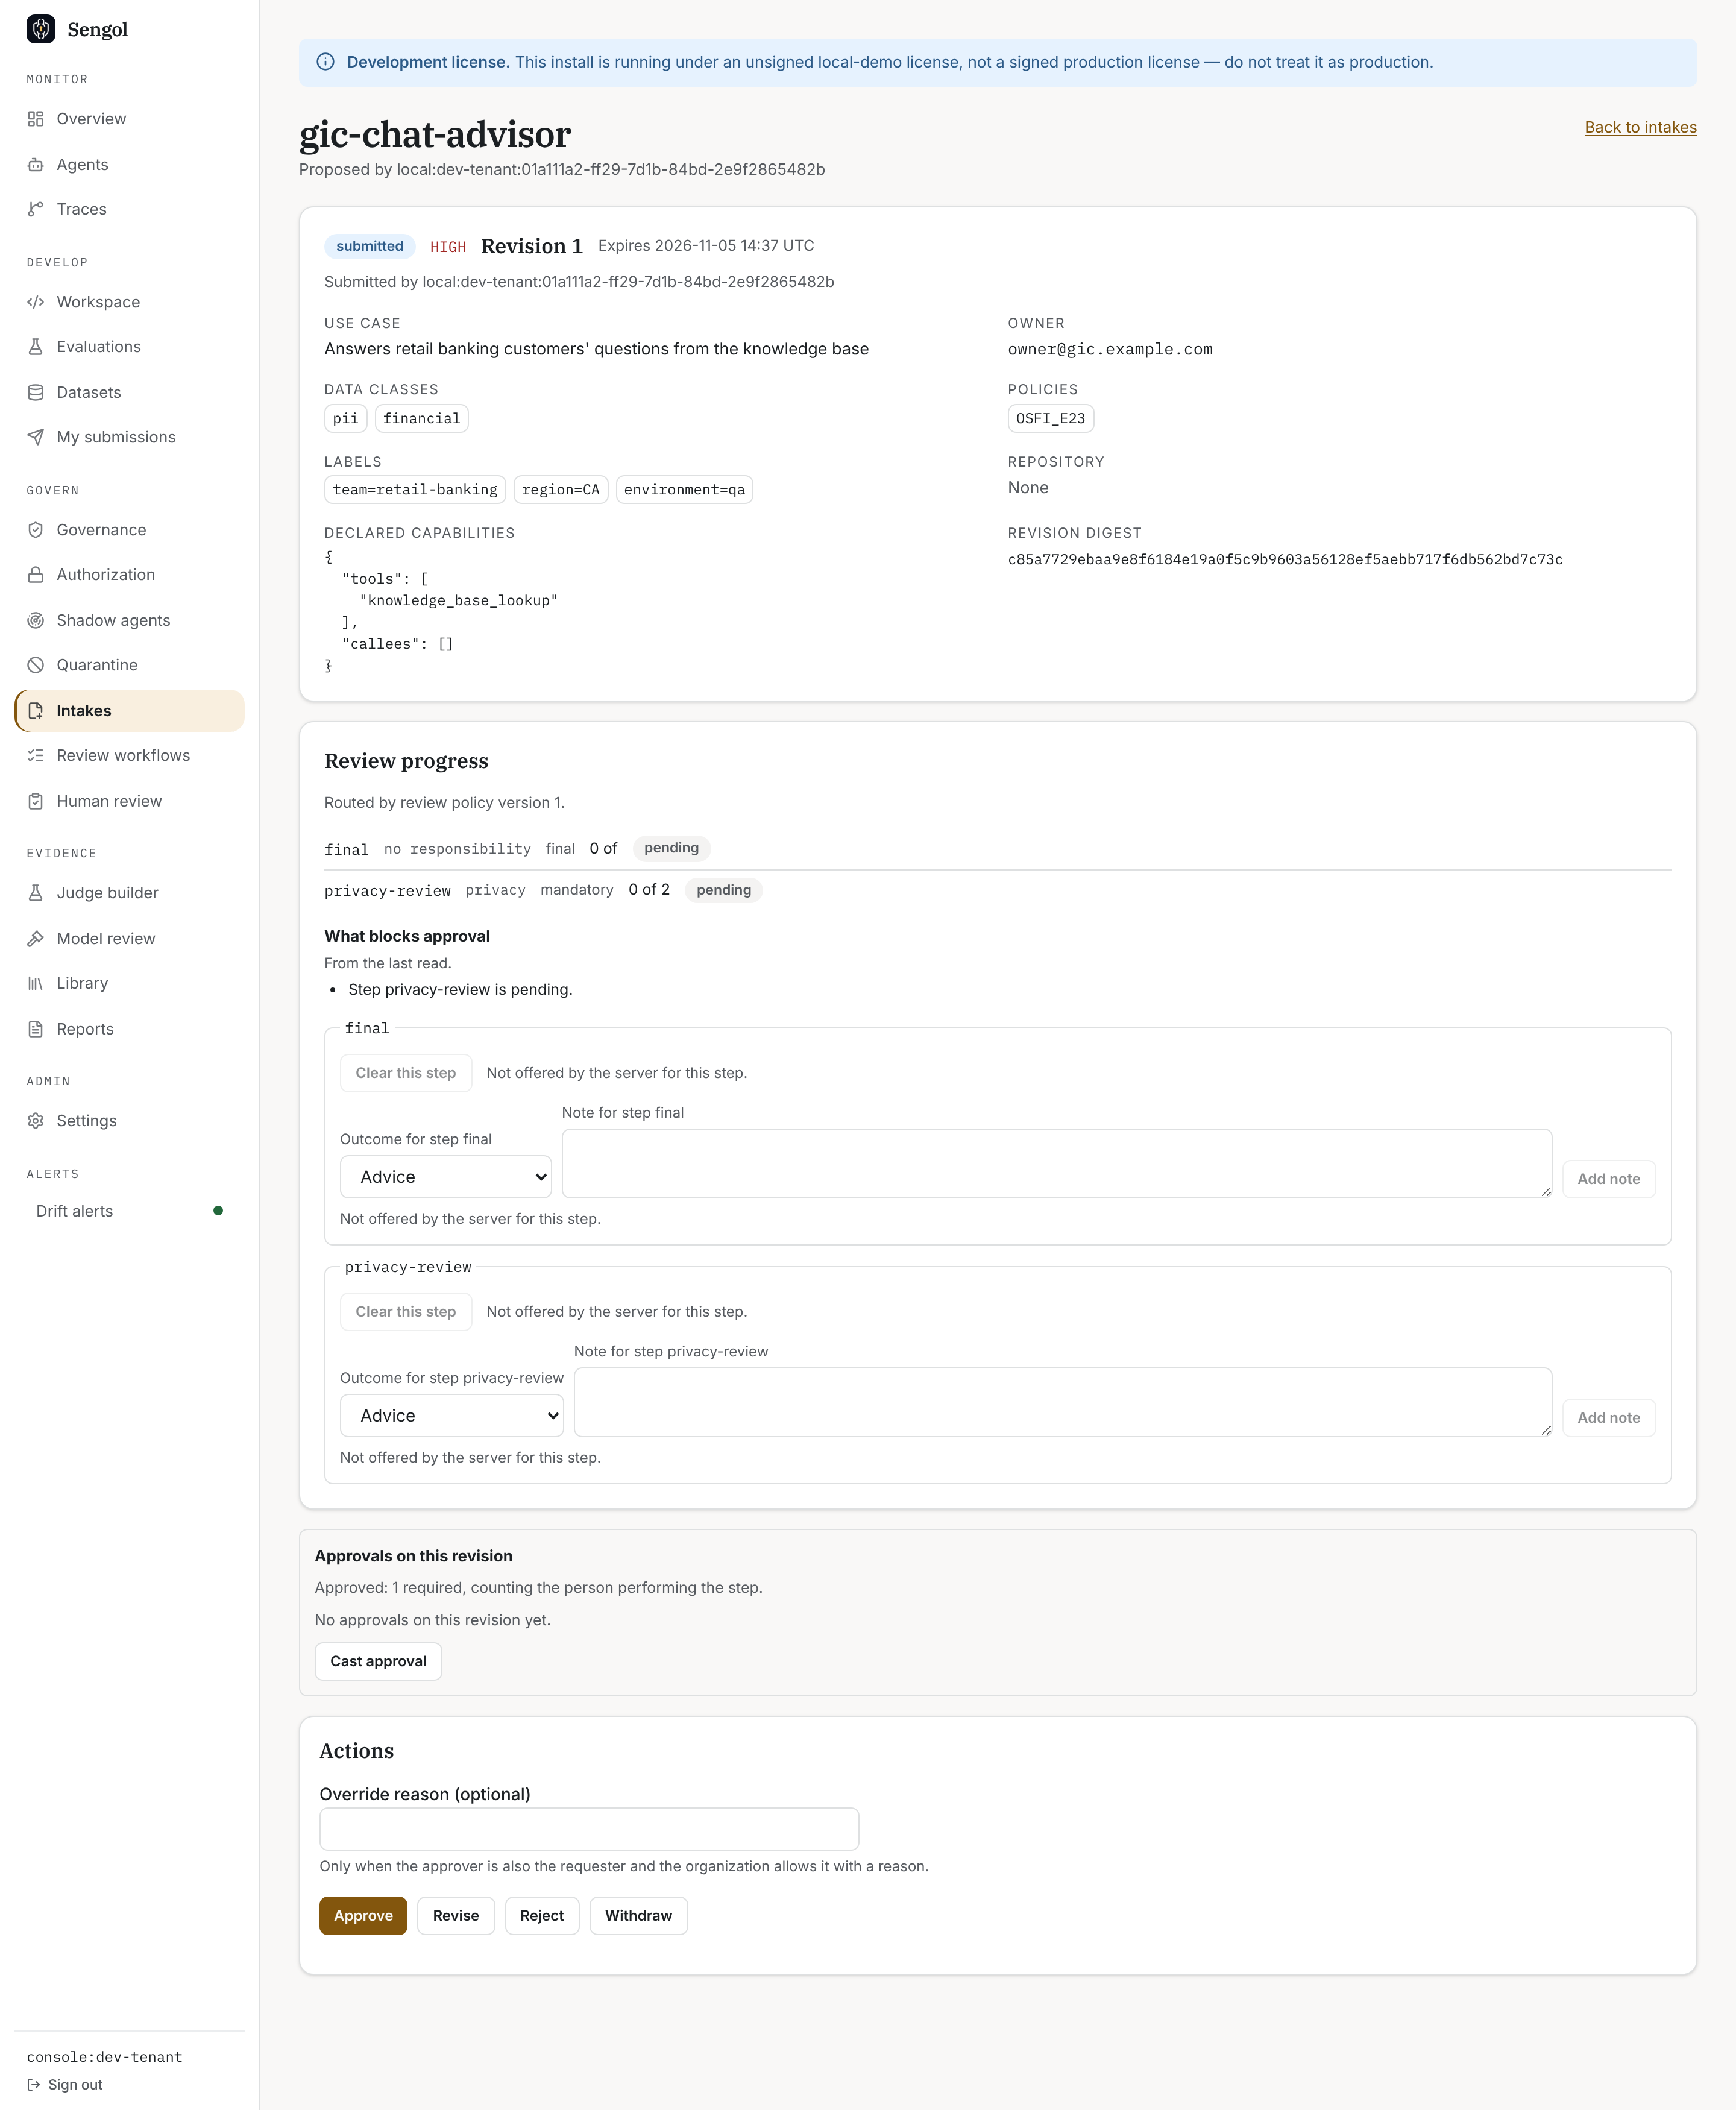
An intake routed by a review policy: its answers, Review progress, Approvals on this revision and Actions.
reason. See Set who
approves intakes.
If a token submitted the intake, the requester must confirm it first. Until
then approving answers requester_unconfirmed.
If a review policy routed the intake, its
mandatory reviews must be cleared before you can approve.
Erasure requests
A data-subject erasure needs two people:- A
croproposes it:POST /v1/audit/erasure/requestswith the trace ids, a subject reference and a reason. Nothing is purged yet. - A different person with
erasure:approve(anapproveroradmin) approves it atPOST /v1/audit/erasure/requests/{id}/approve.